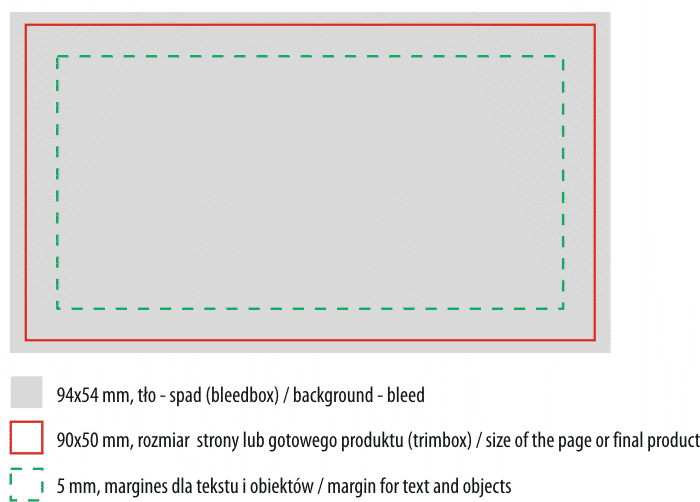
 How to prepare a work in PDF for printing, based on the example of a business card
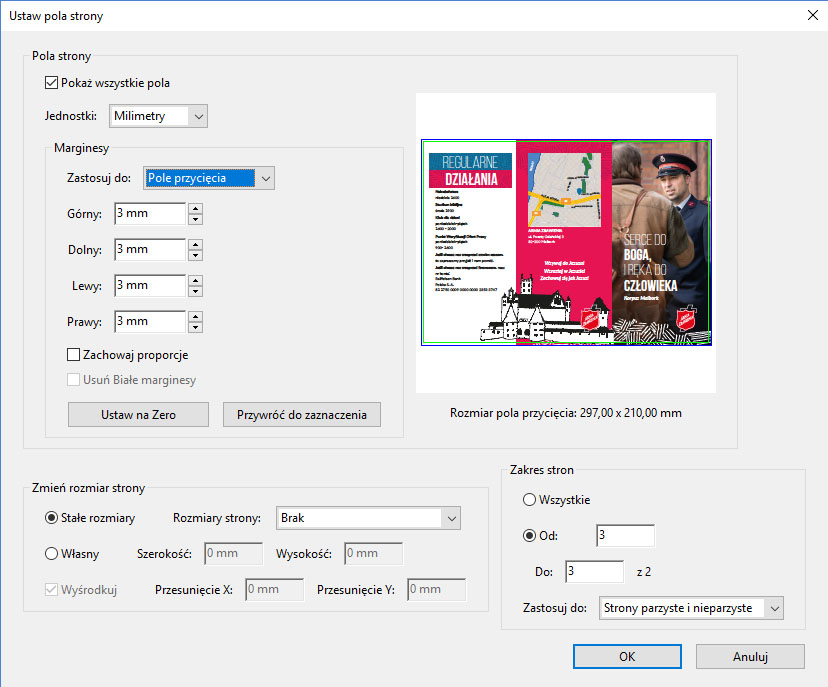 PDF page fields
Adobe Acrobat allows you to check whether the page fields are set correctly.
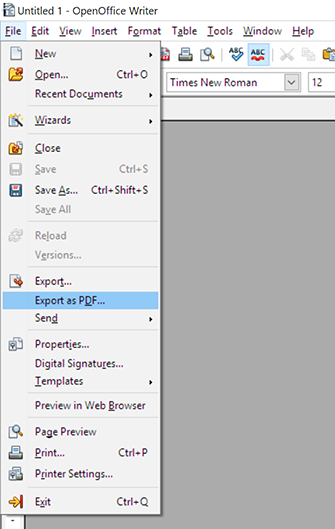 Export a book to PDF from Open Office
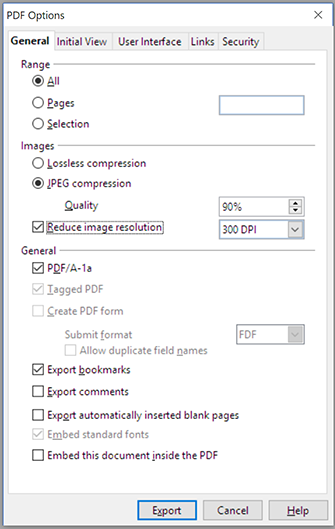 Export a book to PDF from Open Office
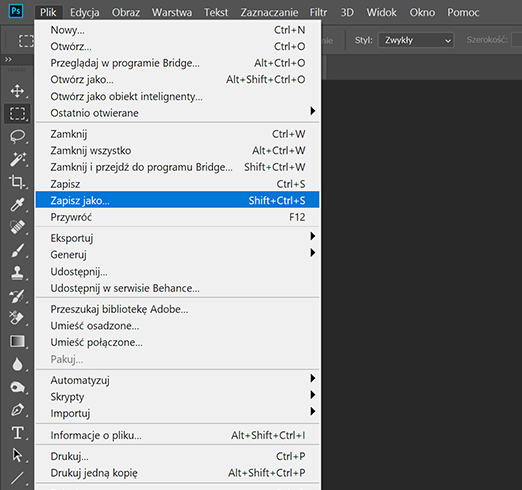 Export your project to PDF from Adobe Photoshop
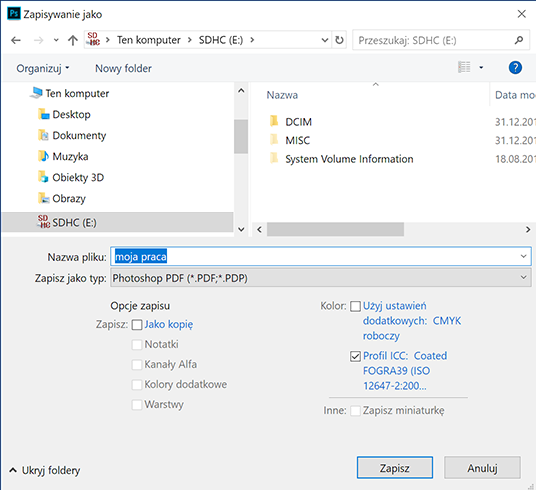 Export your project to PDF from Adobe Photoshop
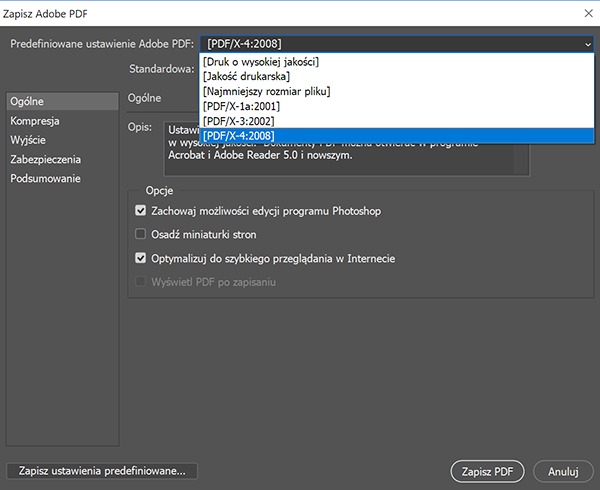 Select predefined PDF export settings
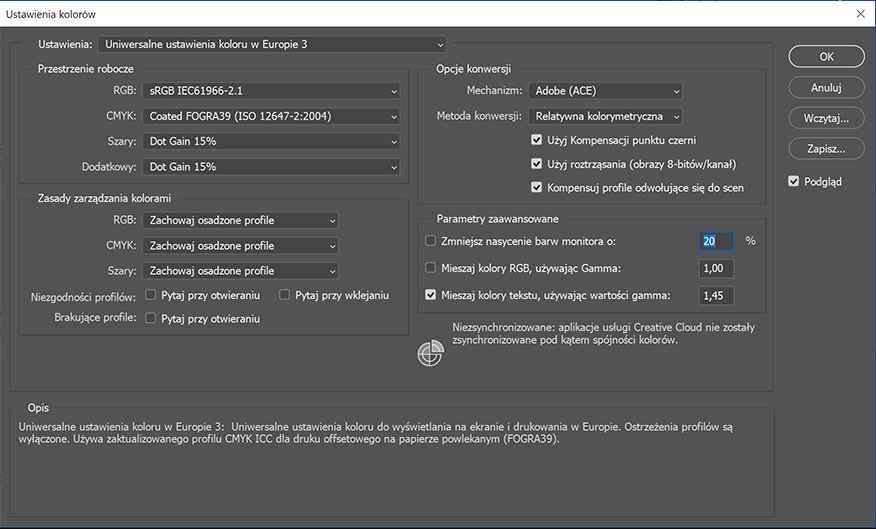 Set correct color management in Adobe applications
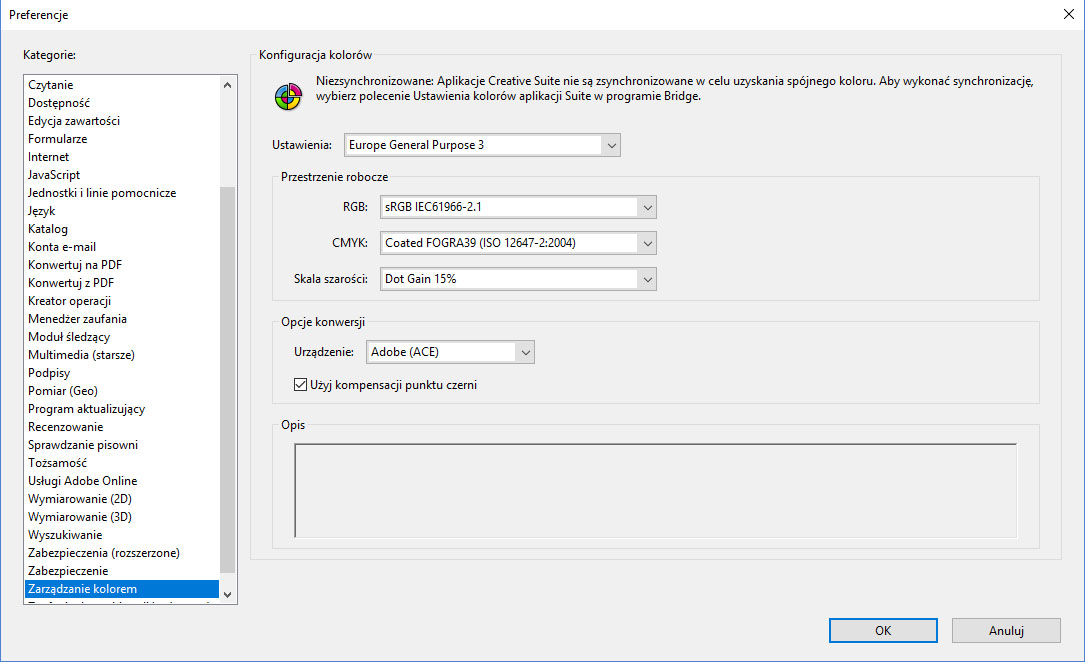
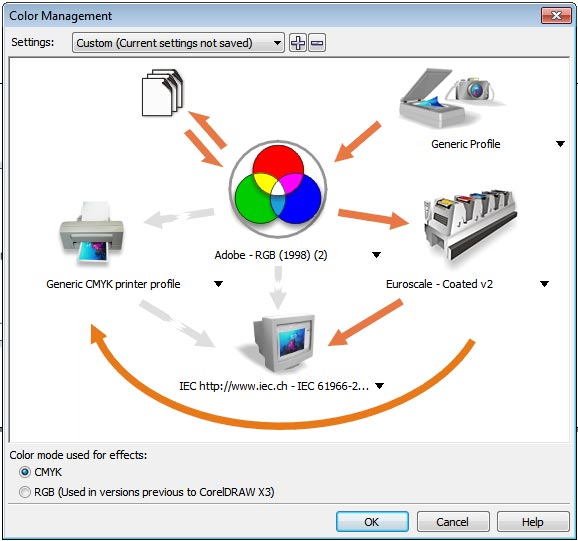 Settings for proper color management in Corel DRAW
How to prepare PDF from Corel Draw?
Guidelines for Submitting Print-Ready Designs
Only PDF files should be submitted for printing.
PDF is the optimal format for transferring all graphic designs and publications. PDF, thanks to internal compression, ensures a small file size, and its internal structure guarantees that the design will look the same on every computer, which is not the standard for other formats.
Before saving your project in PDF format
make sure the layout adheres to the rules necessary for proper printing.
1. For color works, color space: CMYK
Avoid submitting color projects in RGB format, as it may negatively affect the colors. The printing house is not responsible for the print quality of RGB files.
Correct color space settings in Adobe and Corel are shown in the images on the left.
For black and white works, special settings are not required.
2. Defining PDF page fields
Trim box: e.g., 297x210 mm
In graphic and editing programs, this is usually the page size you are working on; check if its size matches the ordered product size. The cutting tolerance is about 1 mm. In PDF format, known as the trim box, it is the expected final product size, e.g., 297x210 mm
Bleed box: 2 mm, and for catalogs 3 mm
In PDF format, known as the bleed box, it is the page background that should extend beyond the page size by 2-3 mm. The bleed is trimmed during the binding process. Trimming the bleed ensures that the background will finally reach the edge of the format regardless of production tolerances during cutting. The cutting tolerance is about 1 mm.
Margin: 5 mm
During design, all important elements such as text, drawings, etc., should not be closer to the edge of the page than the margin. Define a safe margin in the application. Placing important elements too close to the page edge may result in them being cut off in the final product. The cutting tolerance is about 1 mm.
PDF document page fields can be checked using Adobe Acrobat.
3. Exporting/saving work to PDF format
Every graphic and text editor program has the ability to save/export the project to PDF format. When choosing the export/save to PDF option, advanced settings can be selected.
Graphic programs usually have predefined settings for exporting to PDF; in this case, choose according to availability:
- PDF/X-4:2008
- PDF/X-3:2002
- PDF/X-1a:2001
- printing quality
Correct settings for popular programs are shown in the images next to this text.
4. Multi-page works, books, catalogs
Place all pages sequentially in one PDF document, maintaining the correct order.
Covers
- for sewn binding, deliver the cover along with the inner pages in one PDF file
- for glued (soft or hard) binding, deliver the cover assembled with the spine (based on the template downloaded from the calculator). If the spine is to contain text and you cannot assemble the cover, deliver the spine in a separate PDF file.
- the cover template is dynamically generated based on the parameters provided in the calculator, so first set the number of pages and select the appropriate paper and binding before downloading the template.
- Spine thickness is provided in the product calculator during the quote.
Additional PDF settings for advanced users
- Fonts used: embedded in the document
- Bitmap optimization (downsampling):
color and grayscale 350 DPI, monochrome 1200 DPI - Profile embedding: none or compatible with Fogra51 or Coated_v3
- For visual advertising products (banners, signs, etc.)
submit projects in JPG or PDF format with a resolution not exceeding 100 DPI
Uploading projects for printing
- File upload is only available for logged-in users.
- The PDF project can only be uploaded when a quote is saved or an order is placed in the account.
- Upload the file to the order or saved quote. (orders and quotes tabs)
To upload the PDF project
- After placing the order, click the "upload" button next to the order (in the order list)
- To check before printing, click the "upload" button next to the quote (in the quote list)
- You can delete and upload the file multiple times.
- The printing house starts working on the file only after it is approved by clicking the "start production" button
After uploading the PDF file
Select from the list front, back, or complete, indicating whether one PDF document containing the complete set of pages or separate documents for the front and back has been uploaded. Specifying the document type is necessary to initiate the preview creation procedure.
After uploading the project, you will receive a preview link via email within a few minutes:
- red-gray is the cutting area (trim box) corresponding to the finished product format
- gray-white is the area to be cut off (bleed box), the background must extend here
- green-white is the recommended margin for text and important objects (art box)
- blue-white is the fold or crease area
If previews are incorrect
You can delete the uploaded file and then upload the corrected project again.
Common PDF document errors
- document format different from the ordered product format
- page orientation different from the ordered product
- black text defined in all CMYK components
- white objects set to "OPM" overprint (objects will be invisible in print)
- incorrectly defined PDF document page fields
- text close to the cutting edge
- incorrect colors: RGB, Pantone
- text on the fold
- no bleed


